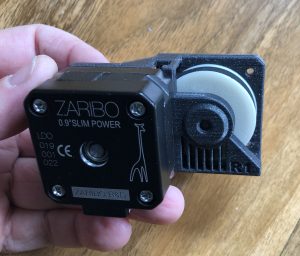
Zaribo Geared Extruder Motor is an experimental DIY mod. It has not been tested by us with any other board and firmware rather than Einsy Rambo and Zaribo/Prusa Firmware. There are many other controllers and printers which runs perfectly fine with Zaribo Geared Motor as far as we have seen.
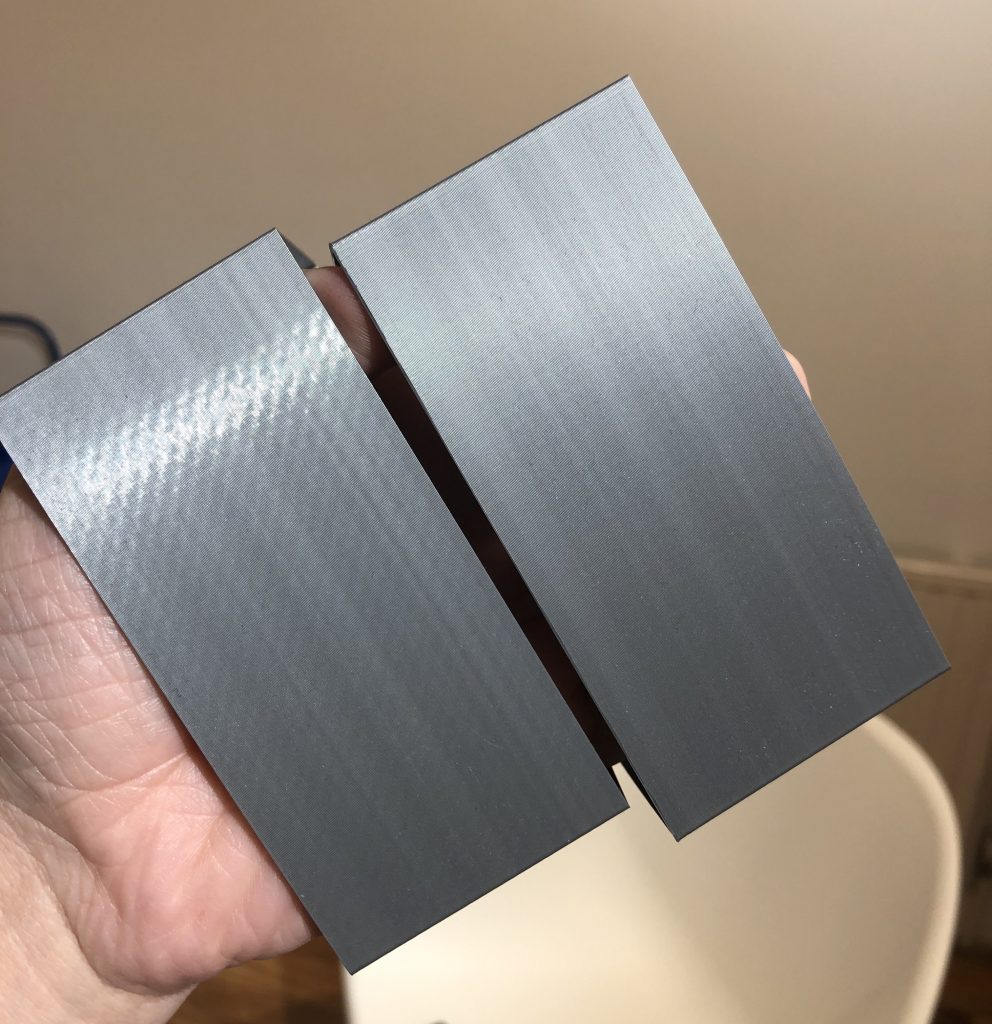
On the picture below, one on the left is printed with the default extruder motor, one on the right is printed with Zaribo Geared Motor. As clearly seen in the picture, the difference is outstanding. The colour difference bands are occurred due to the filament characteristic which is a Prusament PLA.
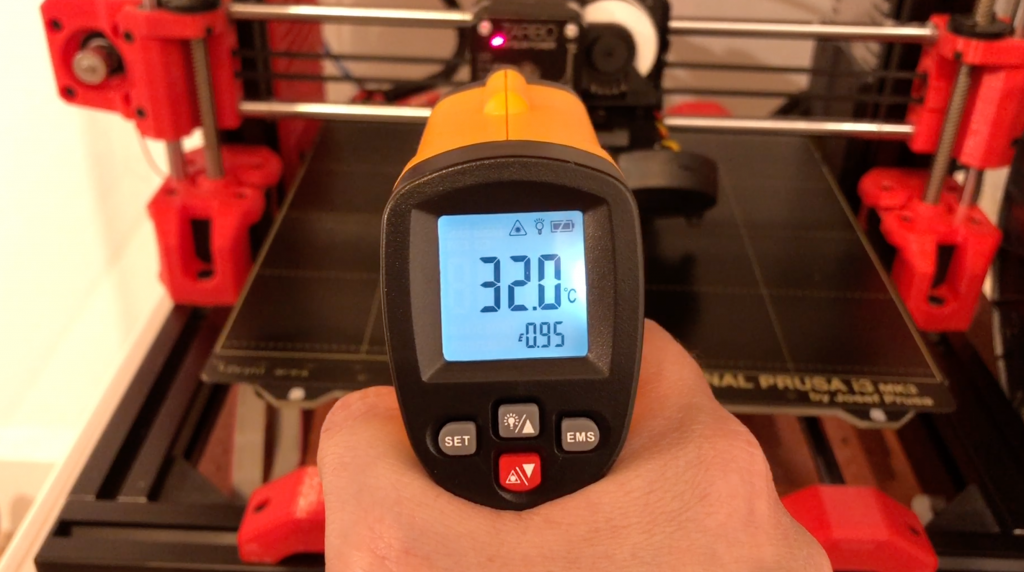
This mode will also overcome the extreme heat issues on your extruder.
We have been influenced by BNBSX Extruder by BunnyScience. However, we designed it from scratch. No belt tensioning is required in our design. We overcame the assembly difficulty by adding a swappable screw hole for the motor.
We also got rid of the washer requirement for the wheel. It has an embed washer by design. We also added a 3rd bearing to the front to keep the shaft more straight and strong. Bondtech gears are pushing the shaft due to the nature of its design.
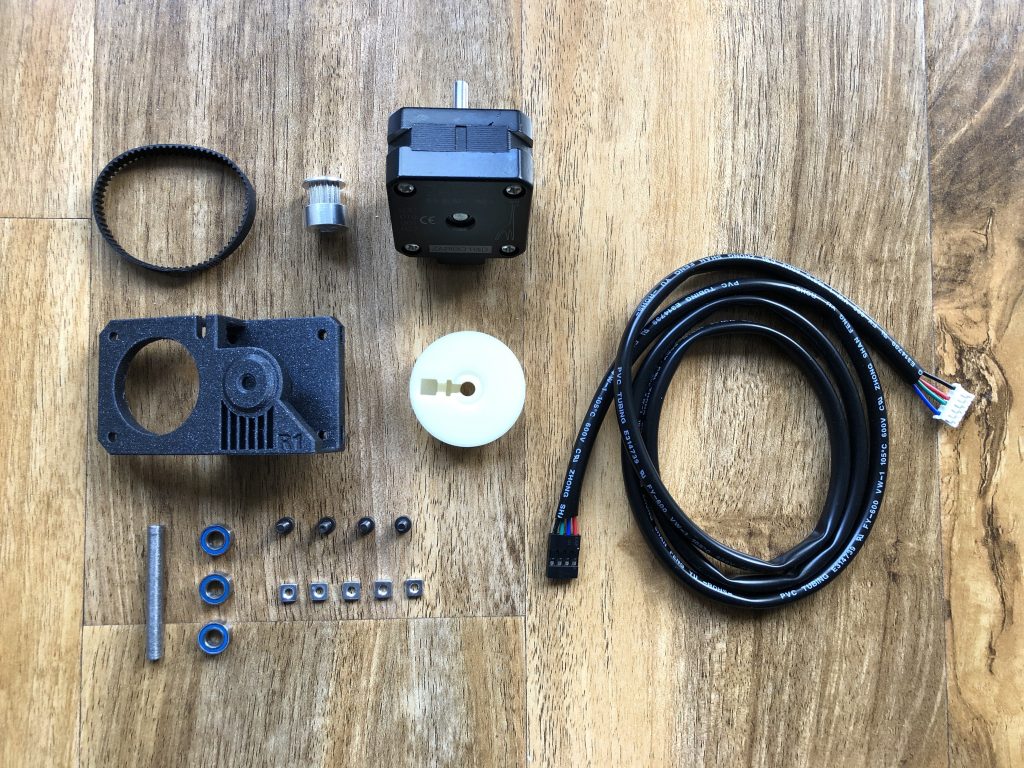
Parts needed:
– Printed Parts: http://bit.ly/330M0w8
– 1 x Zaribo Pancake Motor: http://bit.ly/zaribo-pancake
– 1 x GT2 Timing Pulley: http://bit.ly/gt2-16t-pulley
– 1 x 5mm x 40mm Shaft: http://bit.ly/45mm-D-Shaft
– 4 x M3x8 Socket Cap Screws: http://bit.ly/m3x8mm-socket-cap
– 5 x M3 Square Nuts: http://bit.ly/square-nuts
– 3 x MR105 5x10x4mm Bearings: http://bit.ly/mr105zz-abec-7
– 1 x Loop Belt: http://bit.ly/loop-belt
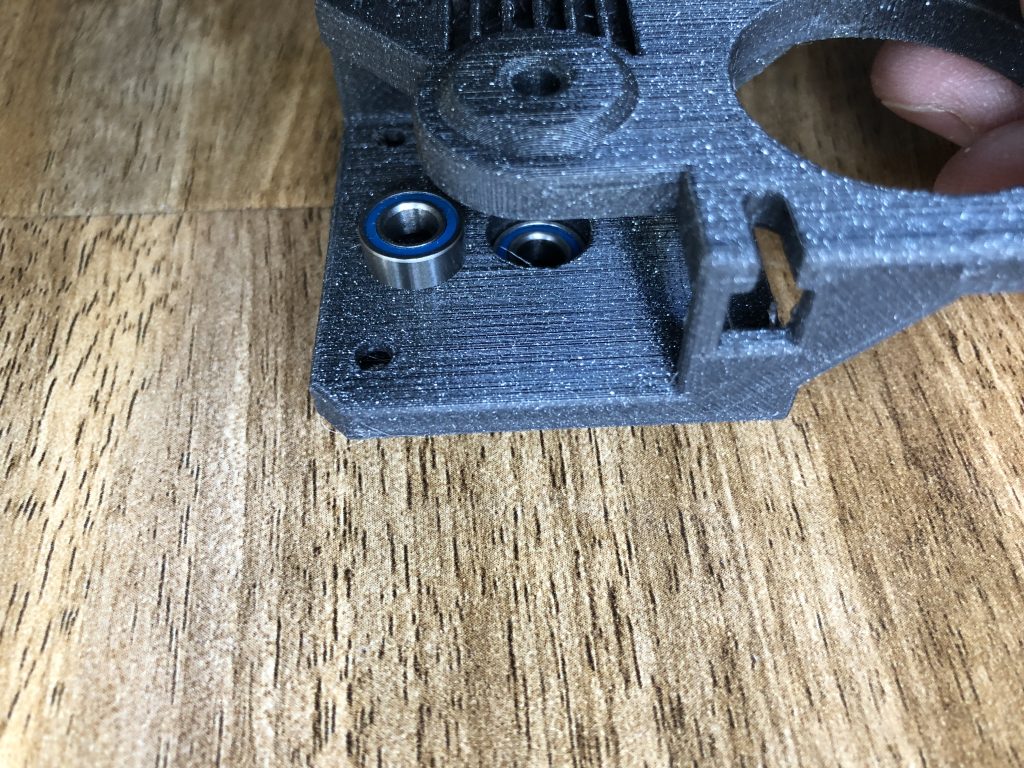
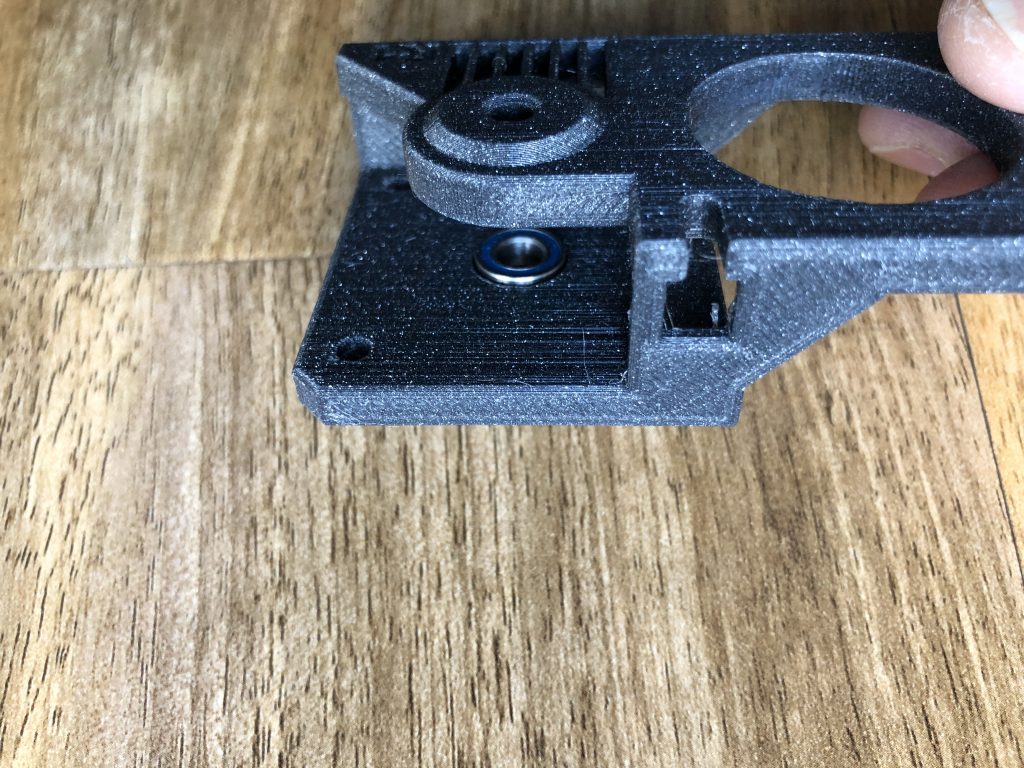
Insert two bearings to the front, bearings shouldn’t be flush fit as seen on the right picture.
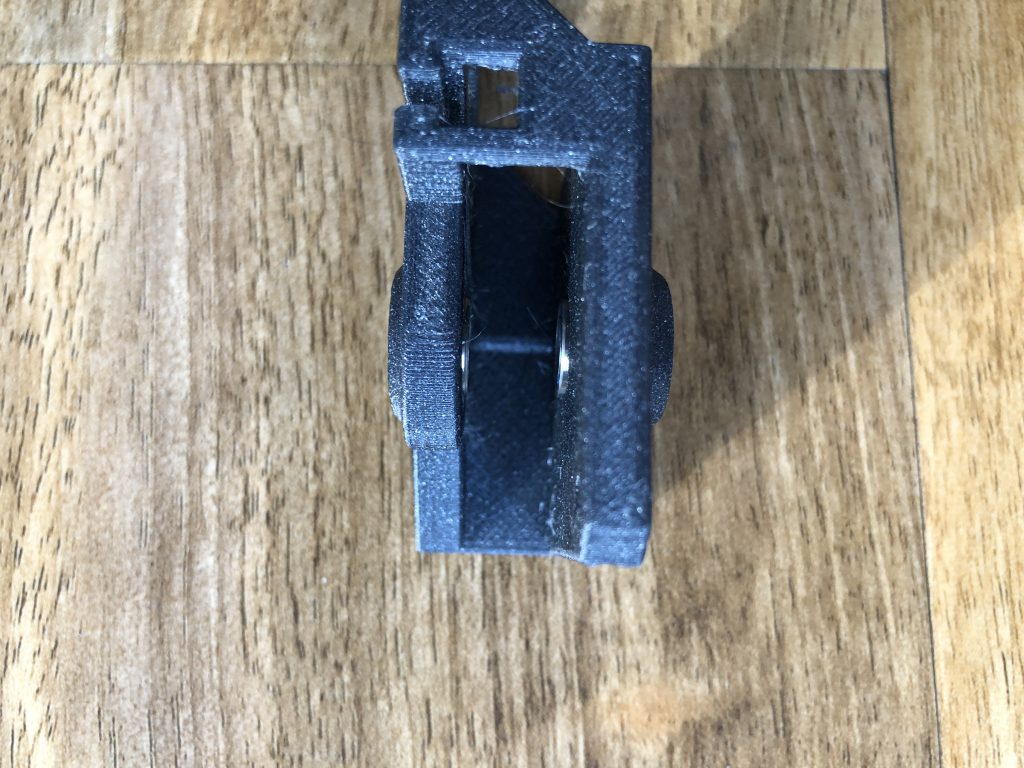
Insert one bearing to the back.
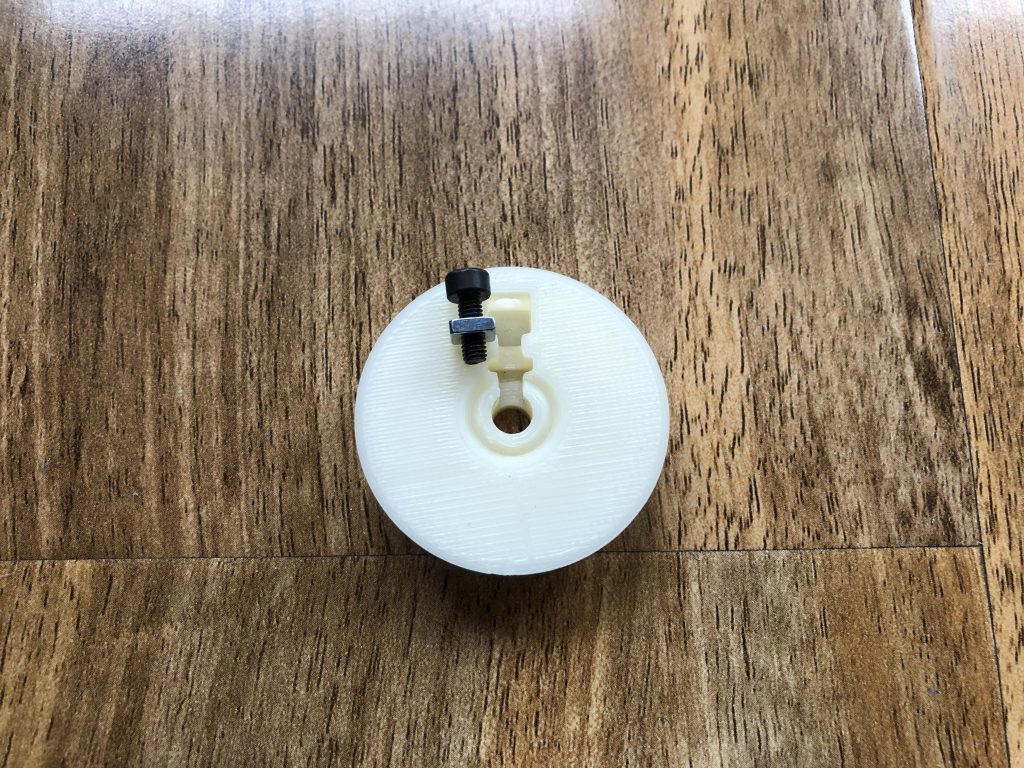
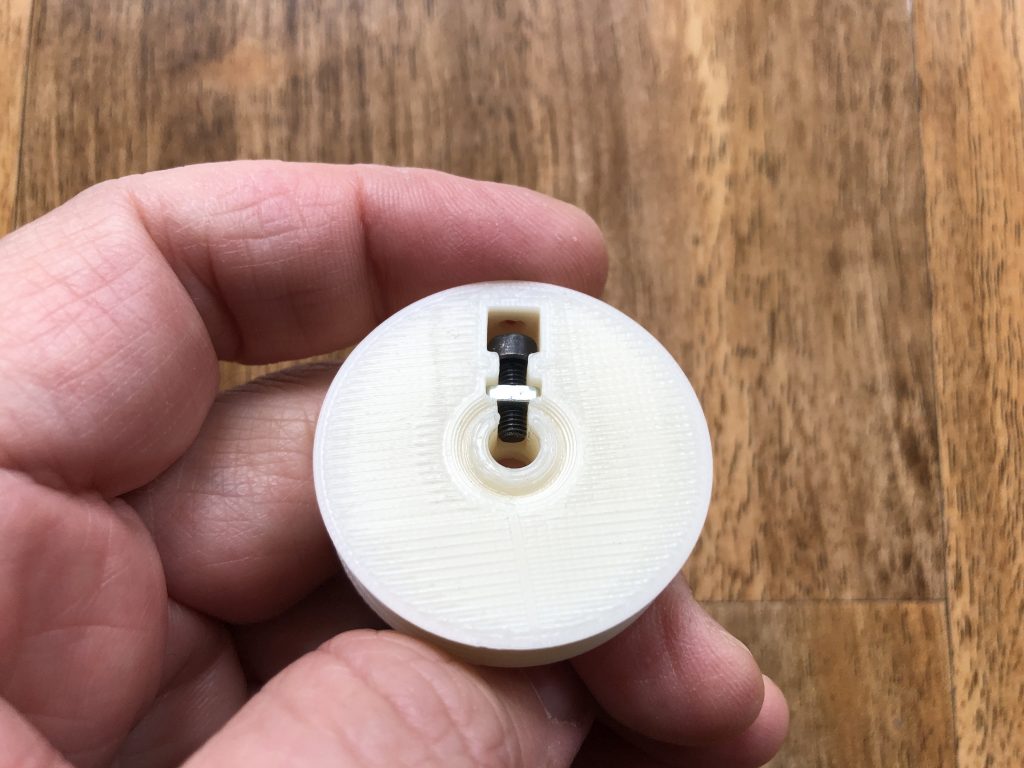
Insert one m3x8 screw with a square nut to its place on the wheel. Push it to the back.
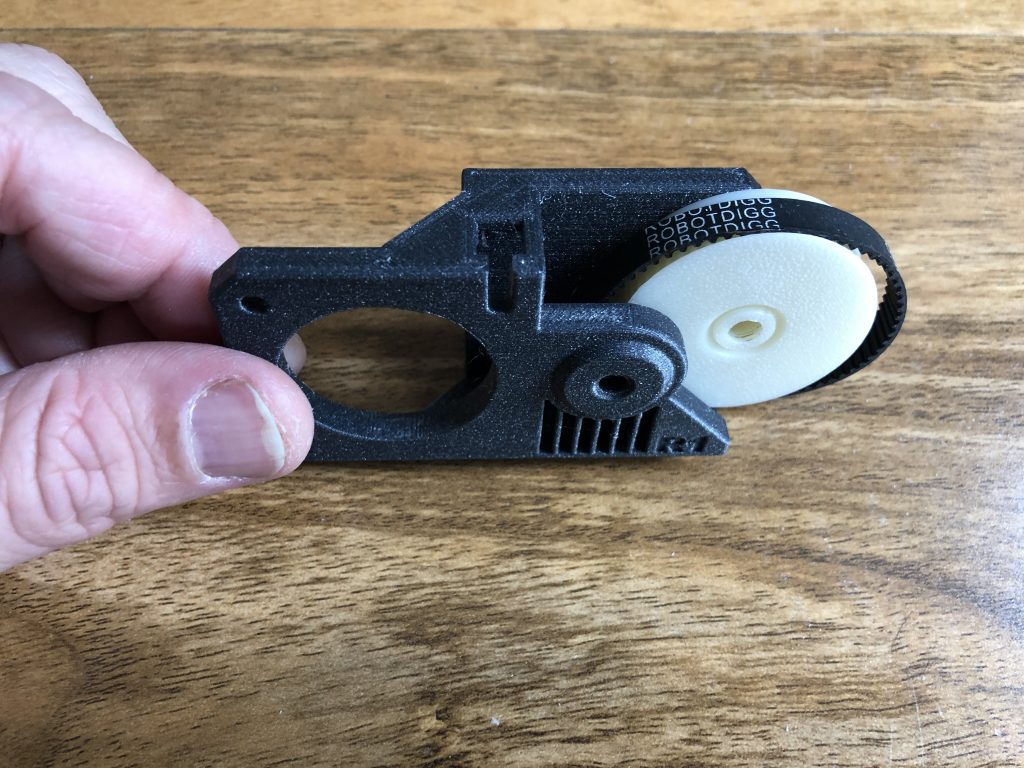
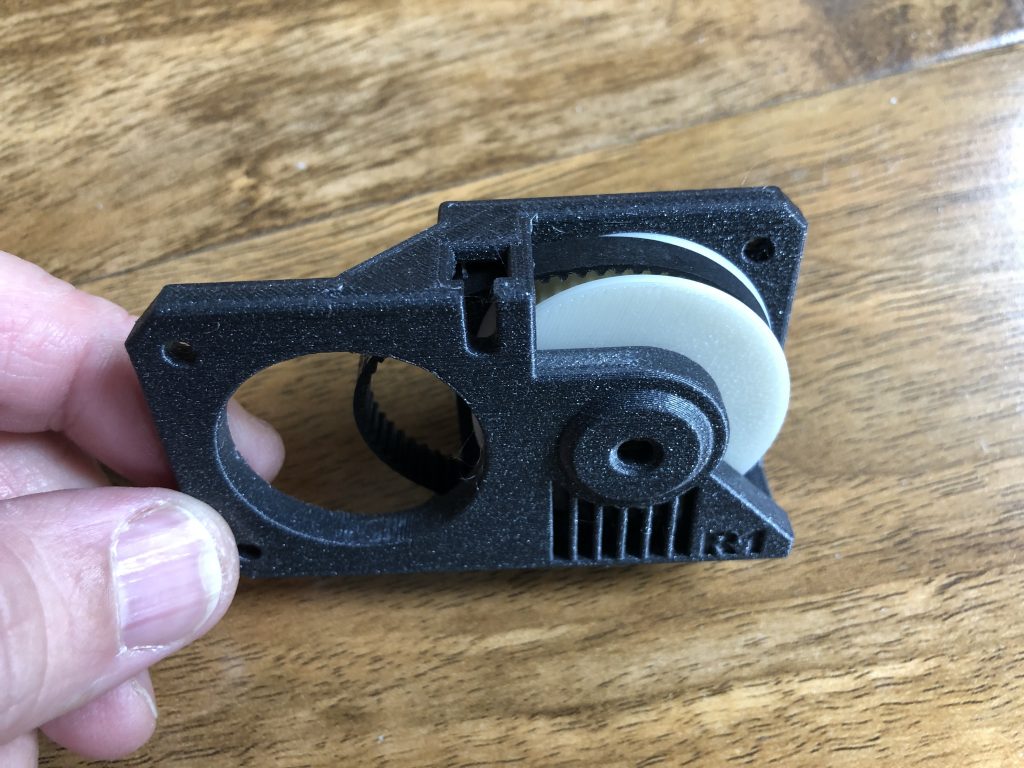
Push the wheel in the gear housing with belt assembled. Align the holes. You will feel sort of a click when the wholes are aligned. The wheel will be free to rotate.
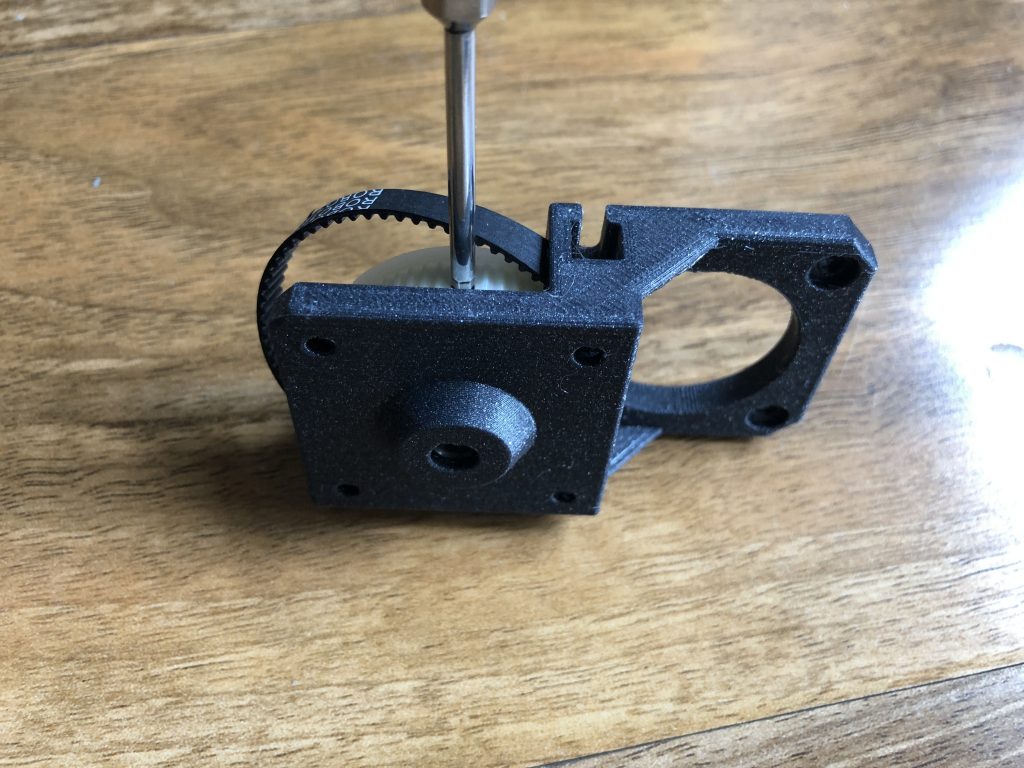
First, fully loosen the set screw on the wheel to be able to push the shaft in.
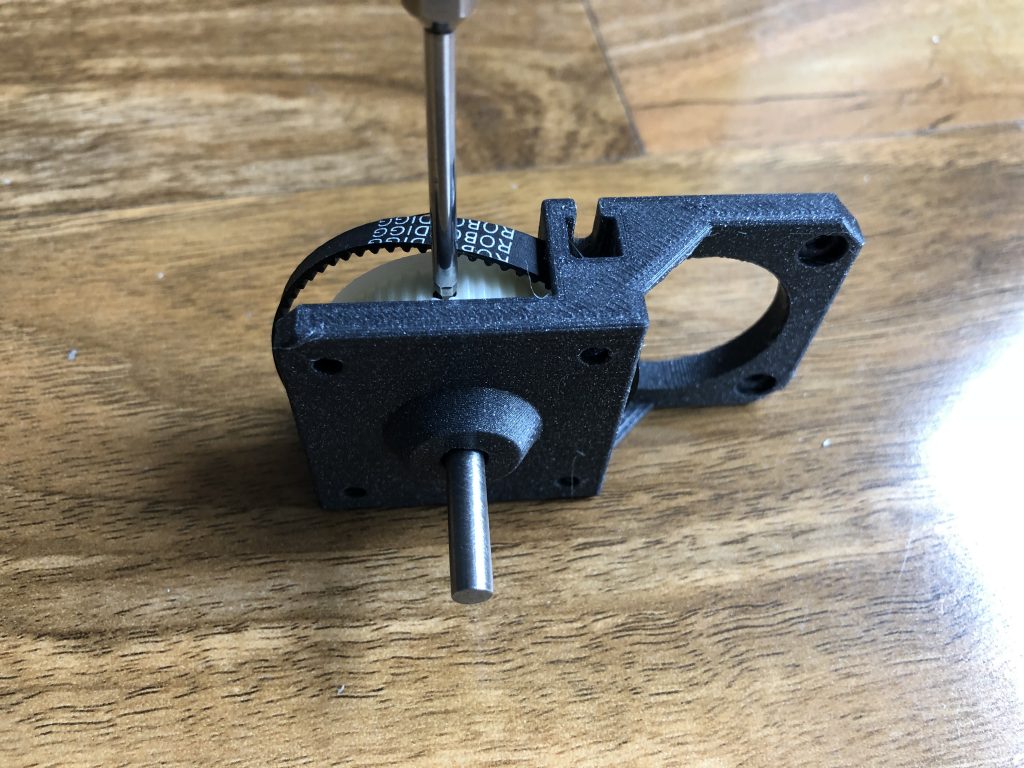
Push the shaft in and tighten the set screw on the wheel. Do not tighten too much as it is a plastic part, you may break or skew the wheel. We had to sand the shaft a bit in order to make it 4.9mm instead of 5mm to fit the bearings. You can use a drill or a motorized screwdriver to sand the steel shaft. Actually a D shaft will be a better choice. If you can afford a D shaft go for it.
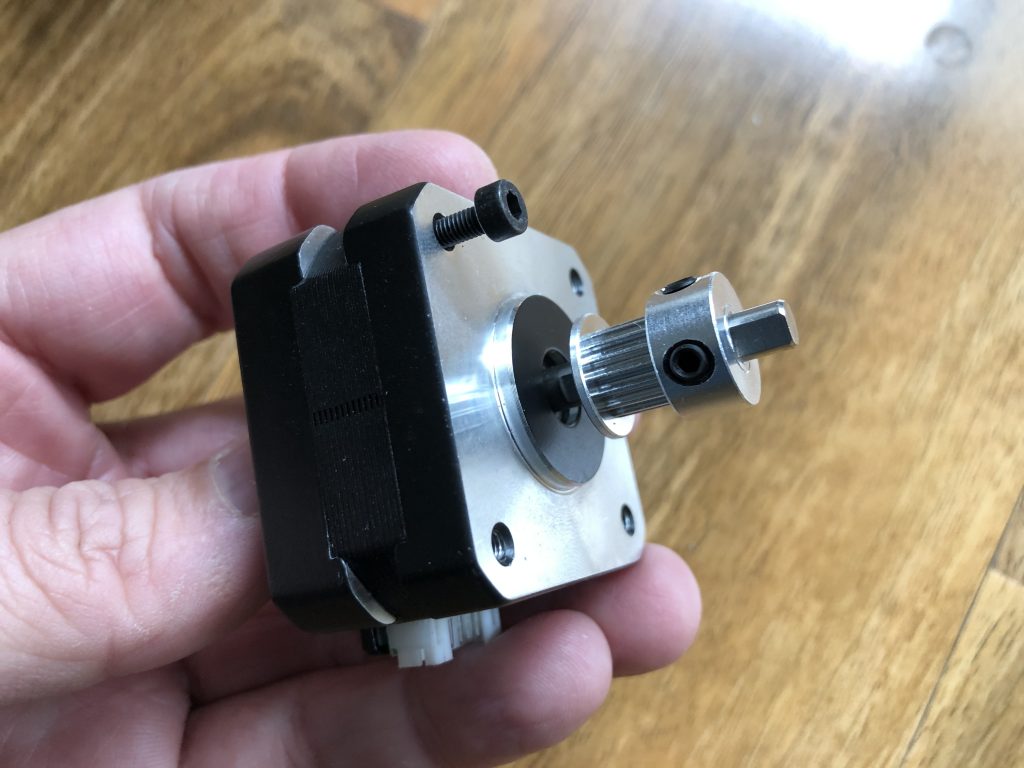
Insert the pulley and put one screw to the left top hole.
Push the motor to its place in an angle as seen in the picture. Align the motor to its position and align the pulley with the belt and tighten the set screws. (there are two set screws on pulleys)
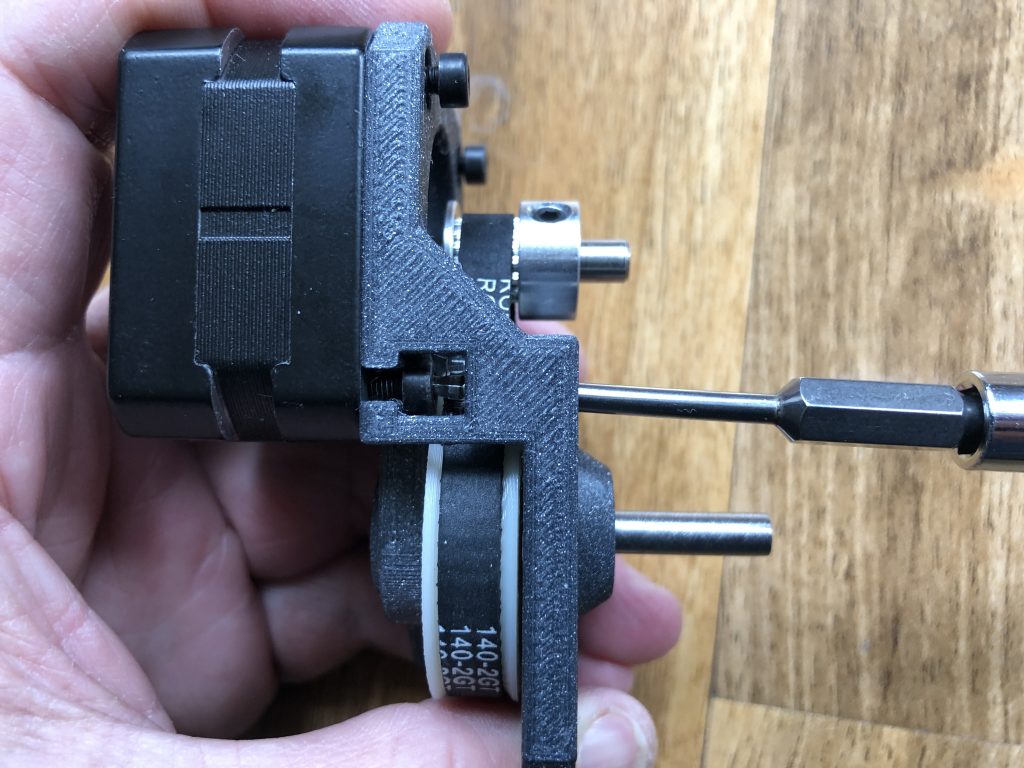
Now you can put the remaining M3x8 screws and tighten to fix the motor in its place. As you see we can tighten the first screw through that front hole. We will insert a square nut there so you won’t be able to unscrew from that hole again. You can use a ball head hex from the side if you will need to disassemble it.
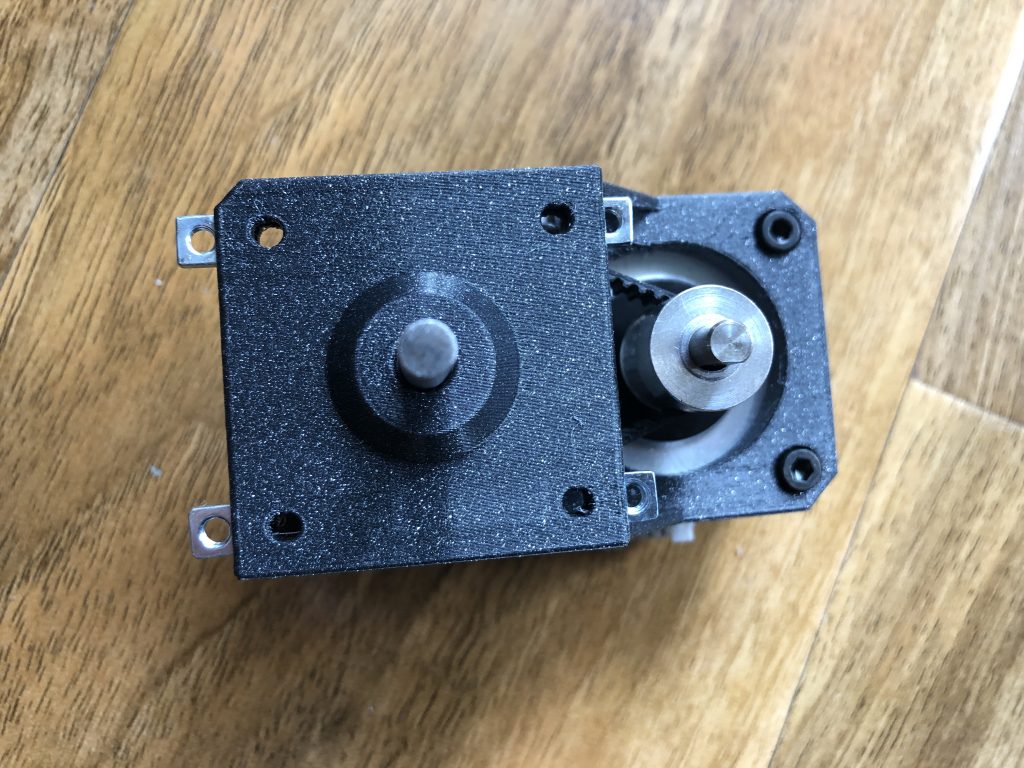
Lastly, you can insert the square nuts.
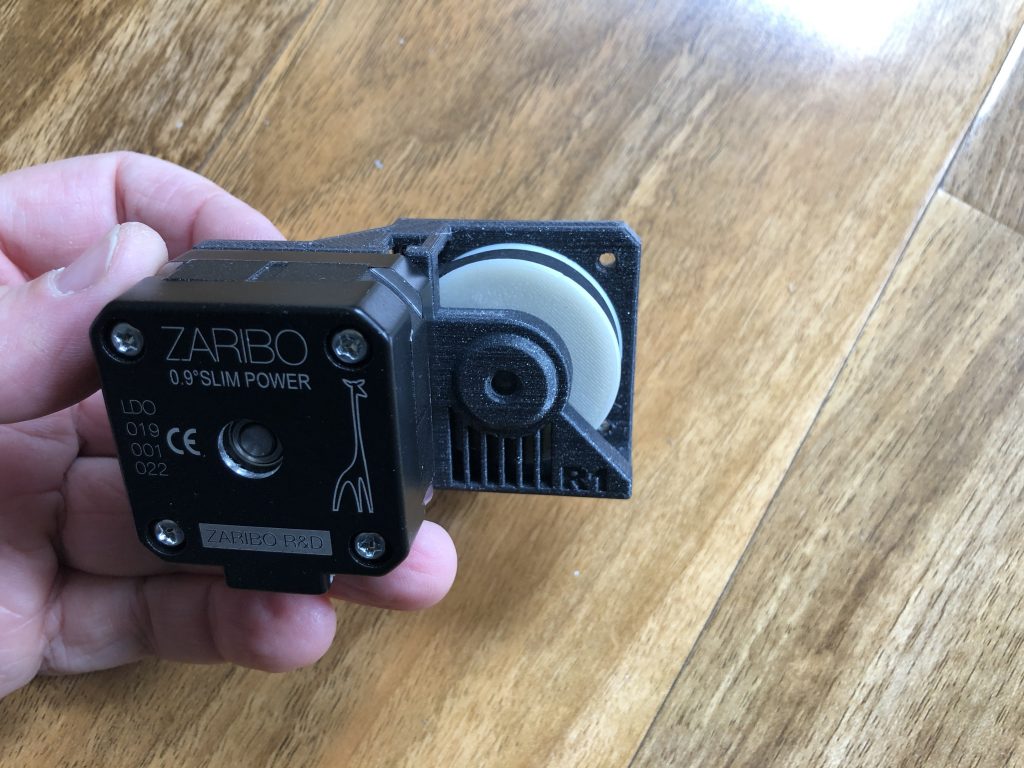
Your Zaribo Geared Extruder Motor is ready to use!
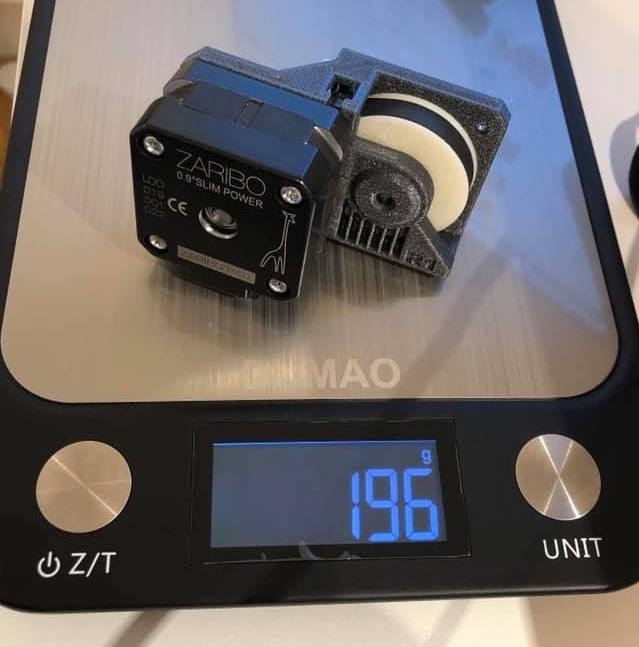
The whole extruder motor design is 80gr lighter than default Extruder Stepper Motor which is 276gr.
After assembling your Zaribo Geared Motor, there is one more thing you have to do. You have to tell your printer that the E motor step values are different. Zaribo Pancake motors are 0.9 degrees, thus you have to enter M350 E8 command through terminal. I used Octoprint Terminal windows but you can use Pronterface if you like. If you are using your default extruder motor from Zaribo or Prusa, please use E32(default) instead of E8.
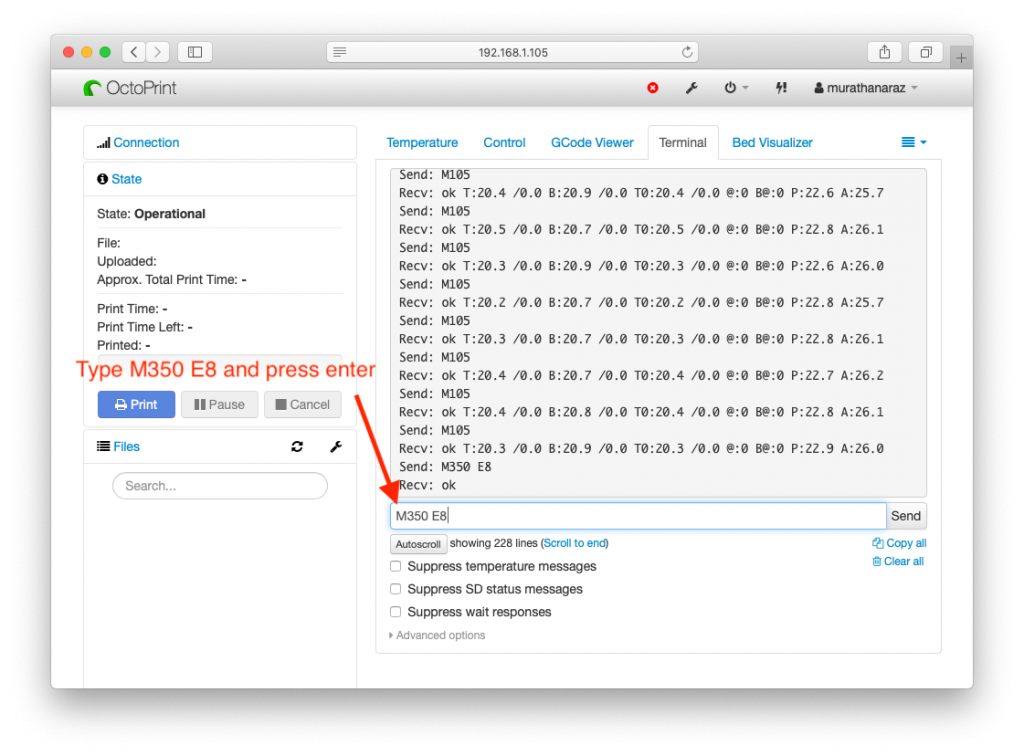
Now type M92 E537 and press enter.
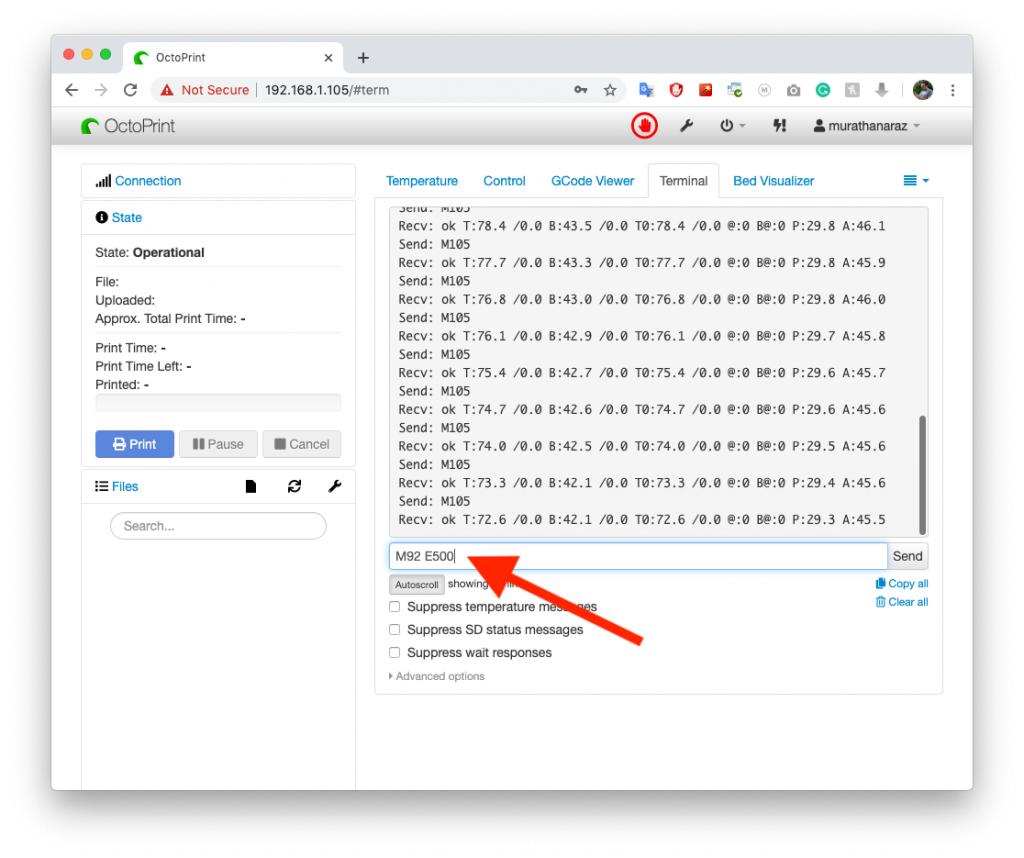
We told our printer that our motor step value is 8 and our extruder motor steps/mm value is 537.
The gear ratio of the larger wheel we used is 54:16 which is 3.375. Please refer to https://e3d-online.dozuki.com/Guide/Extruder+steps+per+mm/96 On this page you will find the calculation method for this step per minute value. According to this calculation, the default value is 473 however as seen on step 2 you should measure the movement of your extruder and fine-tune it.
Now enter M500 to save that information on your cards EPROM and see the values are successfully saved.
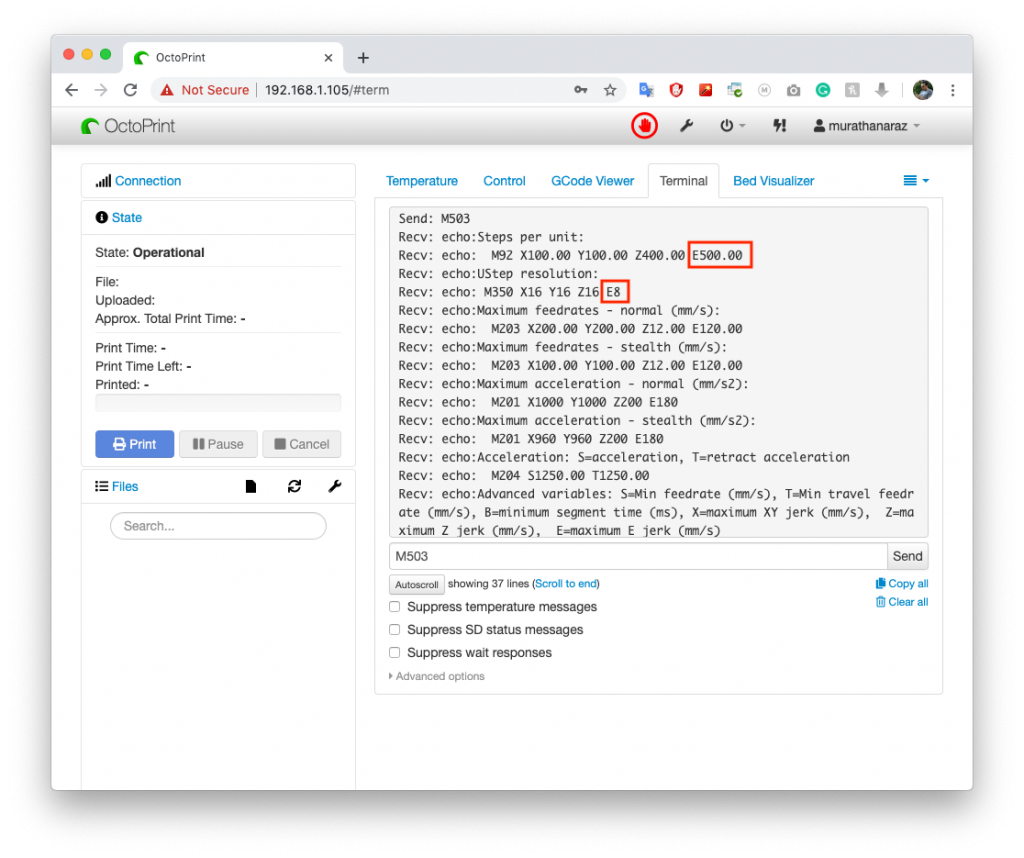
You can check with M503 command as above whether it is successfully saved or not.
Your Zaribo Geared Extruder Mod is completed. Enjoy!
Murathan Araz
Follow us
We will keep you updated
I like this a lot. Is it available for purchase?
Some of the components are available on Zaribo.com you can check the links on parts section.
The large white wheel is not listed for sourcing, is it available?
You can print it by yourself.
There is no information given for this part, not even the number of teeth.
You don’t need to have such information, all you have to do is download the provided .stl files from Thingiverse and print. You can use PETG, ABS, ASA or similar filament.
Does this mod work for the MK3, MK3s or both?
Works for both
It did not fit my MK3. The cone shape holding the two bearings fouled assembly and, once I had removed enough plastic from both parts to fix that, the screws were too short too fix the two parts together.
It has been fixed two weeks ago by shortening that part 0.5mm. When did you download the plastic parts?
Before then, I think!
I’ll download again and compare.
Will the motor come with cable as shown on the picture or i must order it as another item?
Zaribo Pancake Motor comes with the cable.
Is it applicable to the original Prusa?
Hi Jo, yes it is fully compatible with Original Prusa.
Don’t you need to cut 2 notches in the rod?
Yes, would be better… or a D shaft
I have a 1.8 degree pancake stepper motor instead of a 0.9 degree. What M350 command do I use for a 1.8 degree?
You can use E16 or E32
thank you. One more thing, there is a little bit of play between the large printed gear and the shaft going to the extruder gear. After going in one direction it has to move a little bit further to catch on the shaft and start turning it. I tried tightening the set screw a little more but its as tight as it can be. Is this fine?
There shouldn’t be a play between the shaft and the printed gear. You should calibrate your printer if so. The opposite way around, it should tight fit. The set screw should leave a mark on the shaft, you can make a 5-6mm notch there via rasp to not to crook the gear by tightening the set screw.
I completed this last night and powered it up but the extruder motor will not move. I changed the settings and saved using Pronterface. Was there something that needed to be changed with the wiring?
Hi Mark, Which motor are you using?
I bought the .9 using the link from Zaribo.
I assume you followed the guide properly right? Can you check the cable colours if they are the same as the other motors…
Yes. The same colors in the same order on the board. the Prusa motors do not have the plugs so I have no idea about the other end.
Can you use the M503 command and take a screenshot of the codes and send it to support at zaribo.com
It should look like the last picture on this tutorial.
Sent. I plugged the original back in and it is working so the board is good.
Why does this eliminate the problem? What makes the belt get rid of it?
Geared extruders help with the #602 issue AKA inconsistent extrusion and the wavy surface issues. Please see the comparison at the top of the blog post.
Wouldn’t a Bondtech geared extruder also eliminate it?
Yes, geared extruders such as Z’Orbiter and Bondtech.
So a Bondtech extruder would also get rid of it? That’s a 3:1 geared extruder isn’t it?
ho provato a montare il tutto secondo istruzioni ma il problema rimasto tale e quale se non peggiore.
Sorry but I don’t speak Italian🤷♂️ what was your issue?
I HAVE ASSEMBLED YOUR MOD BUT I CANNOT FIND IMPROVEMENTS, EVEN THE STEPS / MM ARE AMAZED. I HAVE PRINTED A 20x20x20 CUBE AND THE MEASUREMENTS DO NOT MATCH. I WANT TO REMOVE THIS CHANGE BECAUSE IT DOESN’T WORK HOW DO I REPORT EVERYONE AS IT WAS?
Did you try factory resetting your printer and starting all over?
NO I CAN TRY TO RESTORE THE FACTORY DATA AND PRINT THE CUBE AGAIN HOPING THAT THE MEASUREMENTS ARE CORRECT 20x20x20 MM
After resetting to factory settings, do the gcode modifications again and try again. Be sure to do the mode according to your motors angle degree.
does it need to change the retraction speed and length?
It works fine with stock retraction settings.
I bought the items and installed them.
It did not improve the print quality!!!!!!
I am totally disappointed!!!!!
The problem is the dual gears, not the drive!!!
Sorry, we missed your comment. Dual gears are the known suspect of the issue 601. However, geared extruders help on the even extrusion quality. Are you using original Bondtech dual gears, if yes, maybe you can check your idler and power gear for alignments.